


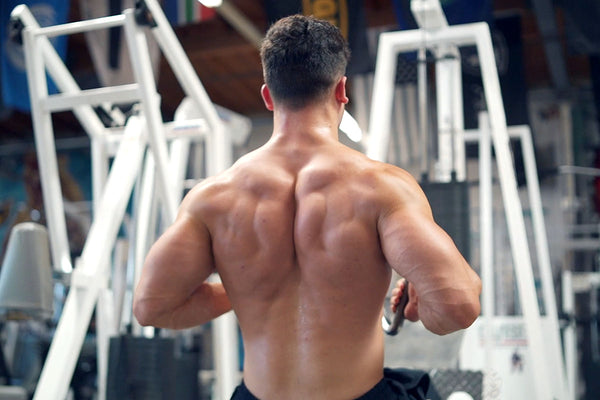
Most lifters have underdeveloped (weak) mid-backs.
There are several reasons for this, but the two main ones are that individuals typically don’t train them properly, or don’t train them at all.
Generally speaking, we tend to favor training those muscle groups which are our strongest or are easily seen (chest, arms, shoulders, quads).
Since we can’t really see the muscles on the backside of our body (at least without looking in the mirror), we usually don’t train them with the same volume, intensity, and/or frequency as we do the muscles on the front of our body.
This leads to muscle imbalances, poor posture, and an underdeveloped physique. If the imbalances between the front and backsides of our body become severe enough, discomfort, pain, and injury ensue.
To help you avoid these unpleasantries and build a stronger, more toned upper body, we’ve created a list of our 5 best exercises for your mid back.
Before we get to the list of exercises, let’s first review why many individuals struggle to effectively train their mid back.
Common Mid Back Training Mistakes
Not Training Your Mid Back At All
The biggest mid back training mistake you can make is not training it at all.
Just because you cannot see your mid back is no excuse not to train it.
To build your best body ever, you need to train every muscle group, including the ones that may be your weakest and/or least favorite to train.
In fact, you could go so far as to say that the weakest or least favorite muscle groups to train are the ones that you should focus on the most.
Lack of Mind-Muscle Connection
Another reason many individuals have weak mid-back construction is due to the fact that they may not have a strong mind-muscle connection, meaning they can’t “feel” the proper muscles working during the movement.
As we said before, training the muscles on the front of our body comes more easily than training the muscles on the back side of our body.
When we perform a chest press or bicep curl, we can see which muscles are working, and (if performing unilateral exercises) palpate (touch) the working muscle too. Both of these help reinforce the mind-muscle connection.
It’s not really possible for you to touch or see your mid back muscles working while performing a back exercise, which can make it difficult to establish a strong mind-muscle connection.
This can be remedied by either performing some mid-back activation exercises, such as face pulls or band pull aparts. Or, you could have your training partner place their hand(s) on your mid-back so you know where you should be focusing during the exercise.
A final pointer would be to perform unilateral exercises (such as a 1-arm dumbbell or cable row). Unilateral exercises allow you to focus on one side working at a time, rather than both, which may help you to feel which muscles should be doing the work.
Not Using Proper Form
Everyone’s ego gets the best of them at one point or another in the gym.
It can be tempting to load up a bunch of weight on the bar or machine and half-rep your way through a set.
While your ego may receive a modest boost, the muscles you’re intending to train are performing a fraction of the work they should, which means you’re not going to get the results you’re hoping for from your workouts.
Mid back training is no exception.
Instead of trying to lift as much weight as your ego wants you to, focus on feeling the stretch and squeeze of every rep. Sure, you may have to use lighter loads than you are used to, but the benefits you’ll derive in terms of a more effective workout (and greater muscle stimulation) will be well worth it.
Not Using the Right Exercises
Just because an exercise is classified as a “back” exercise, doesn’t mean it’s ideally suited to growing your mid back.
Exercises such as lat pulldowns, straight-arm pulldowns, and pull ups are back exercises, but they focus more on the lats than the mid back.
To build a better mid-back, you’ll need to choose the right exercises, use the correct arm angles and proper grips to emphasize the mid back musculature.
With that said, let’s get to our 5 best mid-back exercises!
Best 5 Exercises for Mid Back
Barbell Bent Over Row
The barbell bent over row has been, and continues to be, one of the best compound exercises for building a stronger back.
We should also mention it’s one of the best total body strengthening exercises as well as the bent over row works the entire posterior chain as well as the core, which helps to stabilize your torso and prevent you from falling over.
The exercise can be performed with either a pronated (palms facing down) or supinated (palms facing up) grip.
The advantage of supinated grip is that it allows you to draw the elbows further behind the body and bring the bar in closer to your torso which provides added stimulation for the muscles of the mid back.
Avoid the temptation to do a lot of jerking and heaving with this exercise. Many gym rats end up relying on body English to bring the bar to their torso instead of making the muscles do the work.
As we mentioned above, keep your ego in check and use a weight that you can lift with proper form throughout the entire range of motion.
Chest Supported Row
As great as the barbell bent over row is for developing the mid back, many individuals struggle to perform it properly. A great many others experience lower back pain when performing the movement as well, most likely due to using too much weight and improper form.
The chest supported row is another great exercise that effectively hits the mid-back musculature but places significantly less stress on the lower back, making it an ideal exercise for those with a history of low back pain or those who don’t feel comfortable performing a traditional bent over row.
The chest supported row can either be performed with free weights or cables, and there are also a number of machines available to perform chest supported rows.
Any and all are great options to add to your workouts to help target the mid back.
Generally speaking, a wider pronated grip will help hit the rear delts and rhomboids more, while a narrower, neutral or supinated grip will emphasize the lats and rhomboids.
1-Arm Dumbbell Row
Earlier in this article, we mentioned that unilateral exercises can be helpful for establishing a better mind-muscle connection since you only have to focus on one side of your body working at a time.
Our favorite unilateral exercise for the mid-back is the 1-arm dumbbell row.
Similar to other row variations, which hand position you use and at which angle your bring your arm back will dictate which region of the back musculature you are emphasizing.
Using a pronated grip and bringing the elbow out at an angle to your torso will emphasize more of the rhomboids and rear delts, while using a neutral or underhand grip and keeping the elbow close to your torso will place more stress on the rhomboids and lats.
Two of the biggest mistakes people make when performing the one-arm row are to pull the dumbbell in a straight line up into their armpit. This forces the biceps and forearm to do most of the work, thereby limiting how much weight you are truly capable of lifting as well as not making the back muscles do the work
The second big error is allowing the torso to rotate around as you pull the dumbbell to your side. Many people think this rotation is helping them to do more work, but in reality, the muscles you’re trying to target (rhomboids, rear delts, and lats) aren’t doing much of anything during the rotation. What you are doing by over rotating your torso is placing your low back in danger.
Seated Cable Row
As great as free weight exercises are, they do have one big drawback -- the provide uneven resistance, meaning that certain parts of the movement are more difficult than others.
Using the row as an example, it’s relatively easy at the bottom of the movement and incredibly difficult at the top of the movement.
The benefit of machine and cable exercises is that they provide a more consistent resistance curve throughout the entire range of motion.
Cables also have the added benefit of providing resistance at the bottom of the movement.
For these reasons, the seated cable row is one of our favorite mid-back exercises.
When performing the seated cable row, make sure to avoid using a lot of body english on the concentric phase of the exercise.
During the eccentric (lowering) phase, allow the shoulders to round forward and scapula (shoulder blades) to protract. This provides an extra stretch on the mid-back muscles, ultimately allowing for a stronger contraction and more work to be done by the mid-back.
Bodyweight Rows
Our final top 5 exercise to work the mid-back is yet another row variation -- the bodyweight row.
This move can be performed using a barbell placed in a power rack, smith machine, rings, TRX straps, or a pair of dip bars.wide elbow rows, which we do to hit the mid-traps, rhomboids, and rear-delts.
In addition to being a great exercise for the mid-back, the bodyweight row is also an excellent exercise to help build back strength for those who struggle to perform more than a few isolated reps of pull ups.
Plus, since the inverted row is a bodyweight movement, you also learn how to move your body through space, which has greater carryover to performing pull ups than other back exercises like the lat pulldown.
Similar to other rows, your grip and hand placement will affect which aspect of the back you are emphasizing during the movement.
Using a wide, pronated grip forces the elbows to travel at a 90-degree angle to the torso, which minimizes biceps recruitment and forces the mid-back to do the work (a very good thing for us!).
If standard bodyweight rows are too easy for you, you can add external loading in the form of a weight vest or weight plate on your chest. You can also elevate your feet or incorporate pauses at the top and/or midpoint of the range of motion to increase difficulty.